1. Copy your workspace callback URL
Sign in as a workspace administrator. Open Tenant management → Single sign-on → Add connection. Select Okta and copy the Sign-in redirect URI.
Use the URL shown in your workspace. It ends in /sso/callback. Do not use the public Undertitle homepage or a URL from a screenshot.
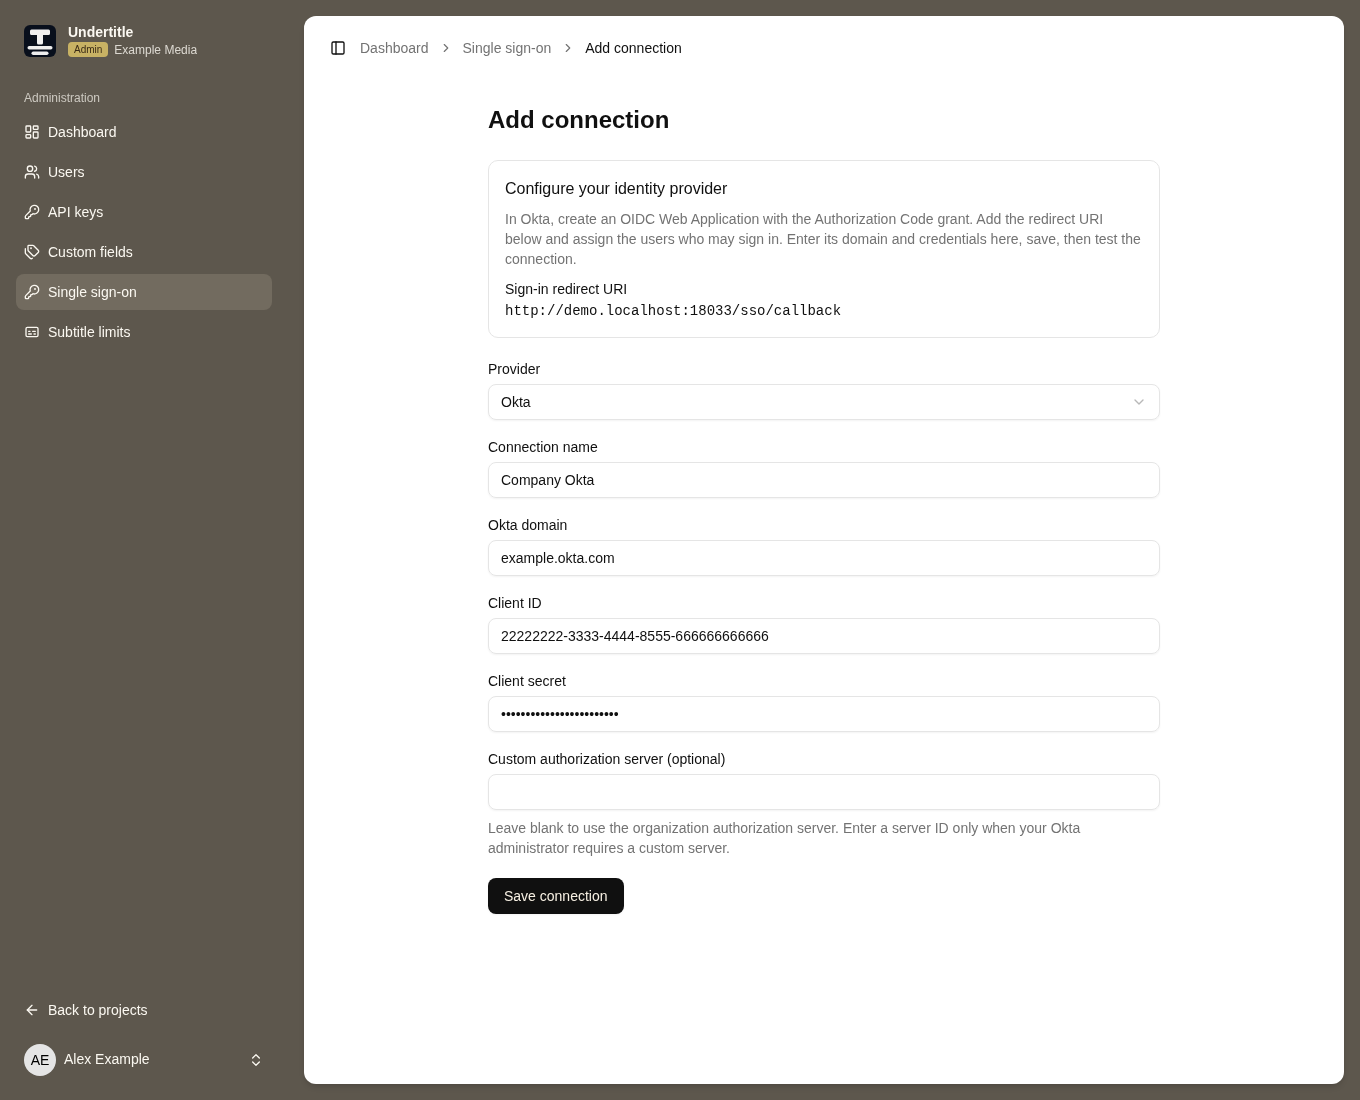
Undertitle demonstration workspace. All example credentials are fictitious. Select a screenshot to view it at full size.
2. Register a Web Application in Okta
In your Okta Admin Console, open Applications → Applications. Some versions call the section Applications and Resources.
- Choose Create App Integration. Choose Classic experience if prompted.
- Select OIDC – OpenID Connect, then Web Application.
- Name the integration Undertitle. Enable the Authorization Code grant.
- Replace any sample Sign-in redirect URI with the exact callback URL from step 1.
- Assign the people or groups who should use this application, including the person who will test it. Save the integration.
- Under General → Client Credentials, use Client secret authentication. Copy the Client ID and Client secret to Undertitle.
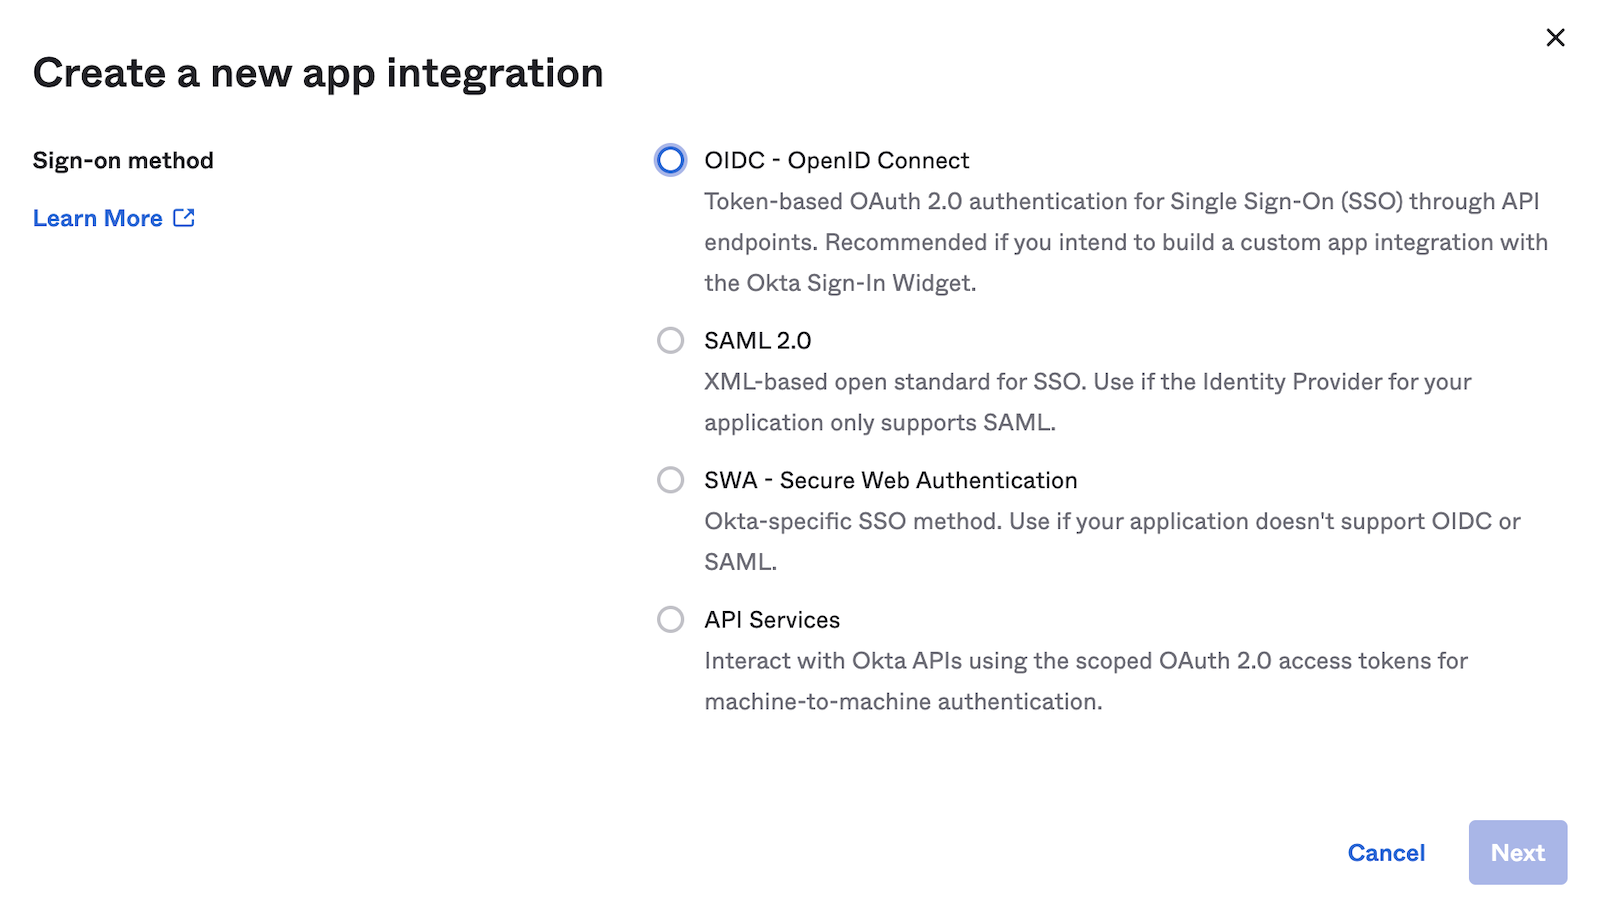
Official Okta example: select OIDC to reveal the Web Application option. This screenshot predates the latest menu labels. Source: Okta Developer.
For this integration, use App Only for Login initiated by. Users start at Undertitle’s login page. Do not select Okta’s simplified flow that sends an ID token directly to the app. Leave DPoP requirements disabled: this integration uses a client secret and PKCE. No implicit grant, refresh tokens, CORS trusted origin or sign-out redirect is needed for this flow.
See Okta’s current OIDC app integration instructions for its full Admin Console options.
3. Save the connection in Undertitle
| Undertitle field | Enter |
|---|---|
| Connection name | A recognizable label, such as Company Okta. This appears on the sign-in button. |
| Provider | Okta. |
| Okta domain | Your organization’s sign-in hostname, such as example.okta.com. Use the sign-in domain, not the -admin console hostname or an endpoint URL. |
| Client ID | The ID from the Web Application’s Client Credentials section. |
| Client secret | The secret value from that same application. |
| Custom authorization server | Leave blank for the organization authorization server. Enter an ID such as default only if your Okta administrator requires a custom server. |
Undertitle requests openid, email and profile. Groups and roles are not requested or synchronized. Choose Save connection.
Discovery and custom servers
Undertitle discovers the endpoints automatically. You do not enter the well-known URL manually:
- Organization server:
https://{your-okta-domain}/.well-known/openid-configuration - Custom server:
https://{your-okta-domain}/oauth2/{server-id}/.well-known/openid-configuration
The organization server is suitable for this sign-in use case. A custom server may require Okta API Access Management and an access policy that permits this client, the authorization-code flow and the requested scopes. See Okta authorization servers. For custom domains, use a consistent domain for the issuer and its endpoints.
4. Test, then enable
- On the saved connection, choose Test sign-in.
- Authenticate as an assigned Okta user. Complete any MFA prompt.
- Return to the connection page. Confirm that the test succeeded, then choose Enable SSO.
- In a separate private browser window, open your workspace login page and choose Sign in with Company Okta (or your chosen name).
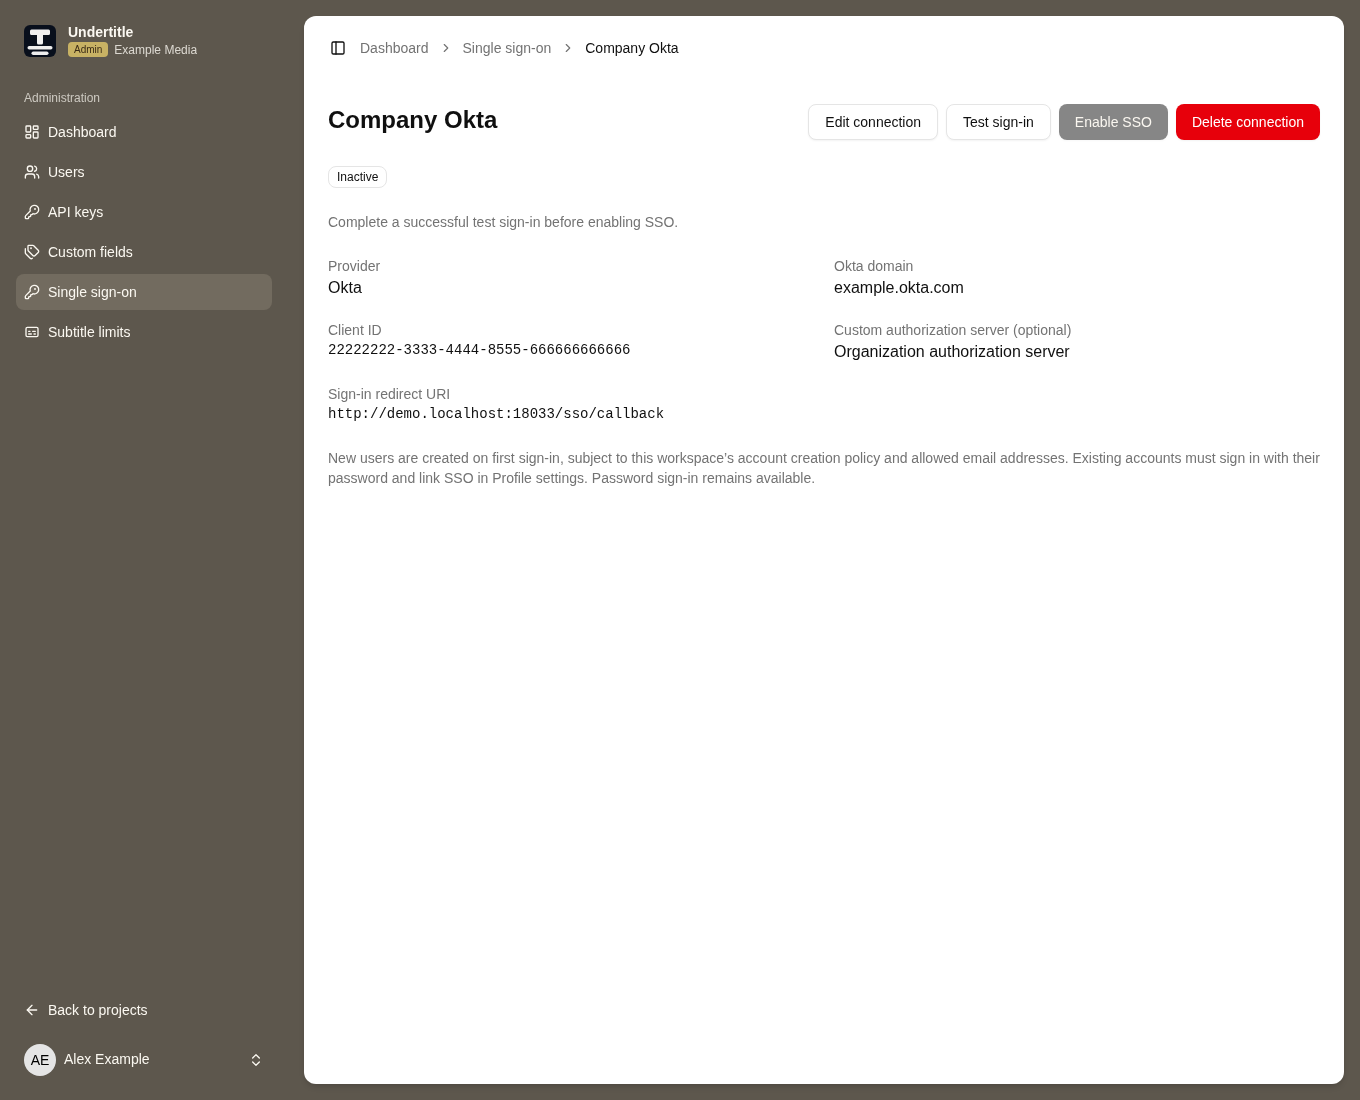
The screenshot shows an earlier interface. Testing is now optional: you can choose Enable SSO without a successful test. Test sign-in remains available.
The test keeps you signed in as the Undertitle administrator. It verifies the connection; it does not create a user or link your administrator account. Complete a separate real sign-in or profile-linking check before inviting colleagues.
5. Give colleagues access
Assign the Undertitle application only to colleagues who should join the workspace. A successful first SSO login creates a workspace user with access to workspace management.
If the email already belongs to an Undertitle account, the person must first sign in with their password and use Settings → Profile → Single sign-on → Connect. Matching emails alone never link accounts. See the SSO overview for account and session behavior.
Troubleshooting and maintenance
| Symptom | Check |
|---|---|
| Redirect URI error | Copy the URL from Undertitle again. Hostname, HTTPS scheme, path and trailing slash must match the registered URI exactly. |
| User cannot access the application | Check the app’s Assignments and Okta sign-in policy, including MFA requirements. |
| SSO sign-in failed | Check the domain, client ID, current secret and selected authorization server. For a custom server, check its access policy. Start a fresh test after making changes. |
| An account already uses this email | Sign in locally and link from Profile. Use password recovery if needed. |
| Connection worked before, but now fails | Check for a revoked secret, changed issuer, changed app assignment or changed Okta policy. |
To rotate a secret, create the replacement in Okta, then in Undertitle Disable SSO → Edit connection, enter the new secret, save, test and enable again. Keep the old secret valid until the replacement is tested where your provider permits overlap. Disabling ends sessions established through that connection; password sign-in remains available. Leaving the secret field blank keeps the saved secret.
Changing the issuer or client ID requires a new connection and explicit linking of existing accounts. Deleting a connection removes its account links. Removing an Okta assignment alone does not end an existing Undertitle session or remove local-password access.